Creating API Integration
The API integration feature allows users to create REST APIs and CodeFusion APIs with either a single response or multiple responses. Before creating an API integration, you need to understand the basic API response structure.
Understanding single response API
In a single response API, { } refers to a single MAP object where the data is stored in a key-value format. If the API response starts with {, it means the entire API response is a single response, where the data is stored in a key-value format.
Sample single response API:
{
"id":1,
"title":"Fjallraven - Foldsack No. 1 Backpack, Fits 15 Laptops",
"price":109.95,
"description":"Your perfect pack for everyday use and walks in the forest. Stash your laptop (up to 15 inches) in the padded sleeve, your everyday",
"category":"men's clothing",
"image":"https://fakestoreapi.com/img/81fPKd-2AYL._AC_SL1500_.jpg",
"rating":{
"rate":3.9,
"count":120
}
}
Understanding multi response API
In a multi response API, [ { }, { }, . . . ] refers to a LIST, which can contain [0 to N] multiple responses. If the API response starts with "[", which means that the response contains multiple objects, where the object count can range from 0 to N. (Where 'N' indicates any number). Objects can be MAP, STRING, or NUMBER. MAP can contain a list at any level in the API response.
Sample multi response API with two MAP objects:
[
{
"id":1,
"title":"Fjallraven - Foldsack No. 1 Backpack, Fits 15 Laptops",
"price":109.95,
"description":"Your perfect pack for everyday use and walks in the forest. Stash your laptop (up to 15 inches) in the padded sleeve, your everyday",
"category":"men's clothing",
"image":"https://fakestoreapi.com/img/81fPKd-2AYL._AC_SL1500_.jpg",
"rating":{
"rate":3.9,
"count":120
}
},
{
"id":2,
"title":"Mens Casual Premium Slim Fit T-Shirts ",
"price":22.3,
"description":"Slim-fitting style, contrast raglan long sleeve, three-button henley placket, light weight & soft fabric for breathable and comfortable wearing",
"category":"men's clothing",
"image":"https://fakestoreapi.com/img/71-3HjGNDUL._AC_SY879._SX._UX._SY._UY_.jpg",
"rating":{
"rate":4.1,
"count":259
}
}
]
You can integrate REST APIs and CodeFusion APIs.
Integrating REST APIs
To integrate REST APIs:
- On the API integration page, click + Create API integration.
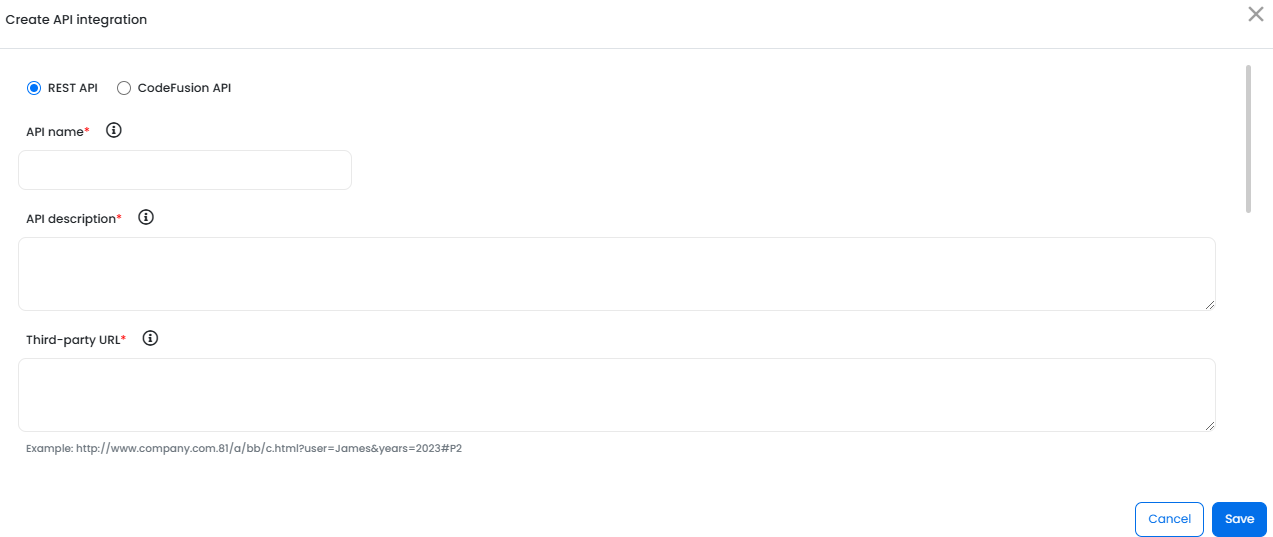
- Click REST API and specify the API details:
- In the API name field, specify the API name.
- In the API description field, specify a description for the API.
- In the Third-party URL field, specify the third-party URL. For example, http://api.server.com:8080/targetone/rest/api/getData
- In the API input parameters area, specify the values for input parameters if any. For example, if you use below third-party URL, then specify the values for input parameters - category and productid.
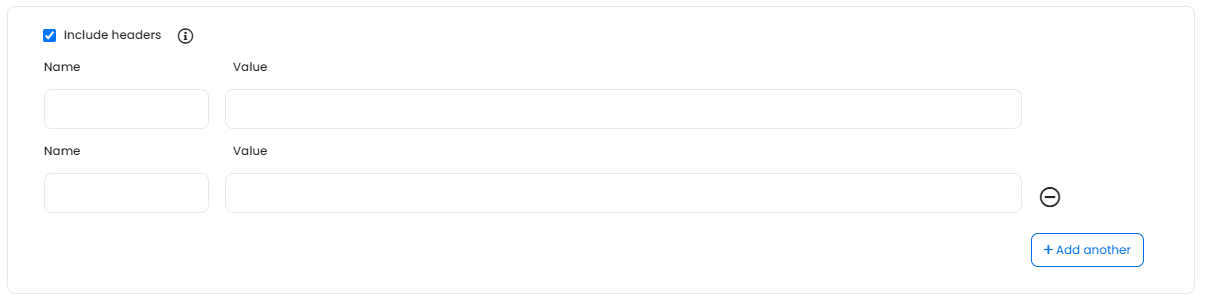
- Select the Include headers checkbox and include the header name and the value.
- Click + Add another to include more headers.
- Click Generate sample JSON. The sample JSON is displayed. The following is an example response for the API details you specified:
- (Conditional) If you select Single response, specify the following in the sample JSON:
- Select the checkboxes corresponding the key-value pairs you want to add.
- Click Add output field manually. Specify the attribute path and click
 . The attribute is added to the list in the Attributes Selected from API area
 - In the Attributes Selected from API area, review the attributes you have selected from the API response. Modify the attribute name if you want. You can click
 to remove the selected attribute.
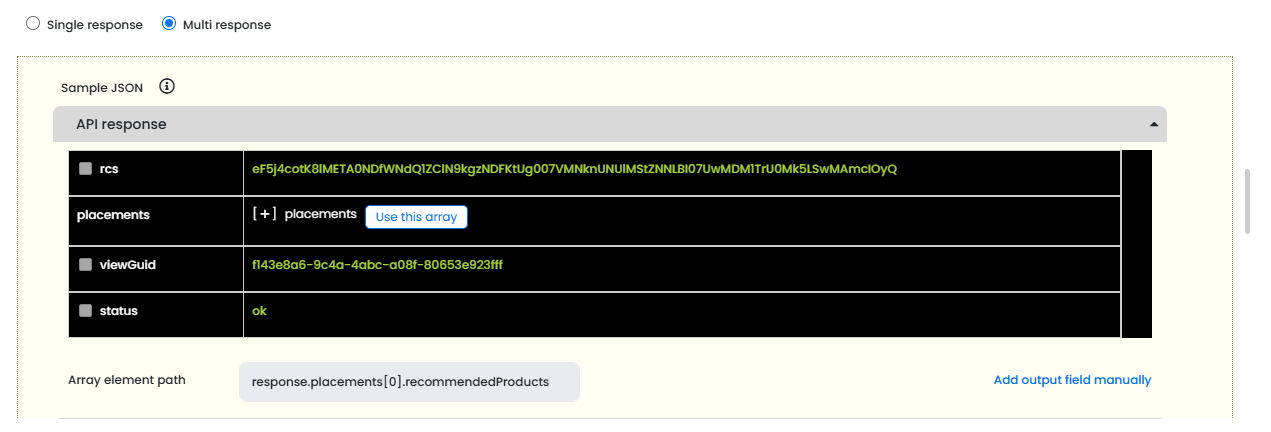
- (Conditional) If you select Multi response, Array element path is displayed in the sample JSON.
- Select the list which is present at any level in the sample JSON.
- Click Use this array. Array element path is displayed with the selected element.
- Select the checkboxes corresponding the key-value pairs you want to add.
- Click Add output field manually. Specify the attribute path and click . The attribute is added to the list in the Attributes Selected from API area
- In the Attributes Selected from API area, review the attributes you have selected from the API response. Modify the attribute name if you want. You can click to remove the selected attribute.
- Click Save.
The Create API integration window is displayed.
If you want to specify any API input parameters additionally, then specify them using { }. For example, http://api.server.com:8080/targetone/rest/api/getData?category={category}&productid={productid}.
http://api.server.com:8080/targetone/rest/api/getData?category={category}&productid={productid}
The REST API is saved and displayed on the API integration page.
You can use the output parameters as Merge Tags in Active Content. This API will be available in the list of APIs when you configure API integrations in Active Content.