Creating Data Entities
You can create data entities, which are essential for storing and managing imported data. Each data entity serves different roles in data management and journey building.
To create a data entity:
- On the Data model extension page, click + Create data entity. The Create data entity page is displayed.
- On the Create data entity page, specify the following details.
- Data entity name: Specify the data entity name.
- Description: Specify the description for the data entity.
- Entity type: Select the entity type. Available entity types are Customer entity and Non-customer entity.
By selecting an entity type, a data entity is classified to accept only customer entity or non-customer entity information. Such entities can be used as a journey source on the Workbench page of Journey Builder. - Define the data entity by using one of the following options:
- Import from file
- Specify manually
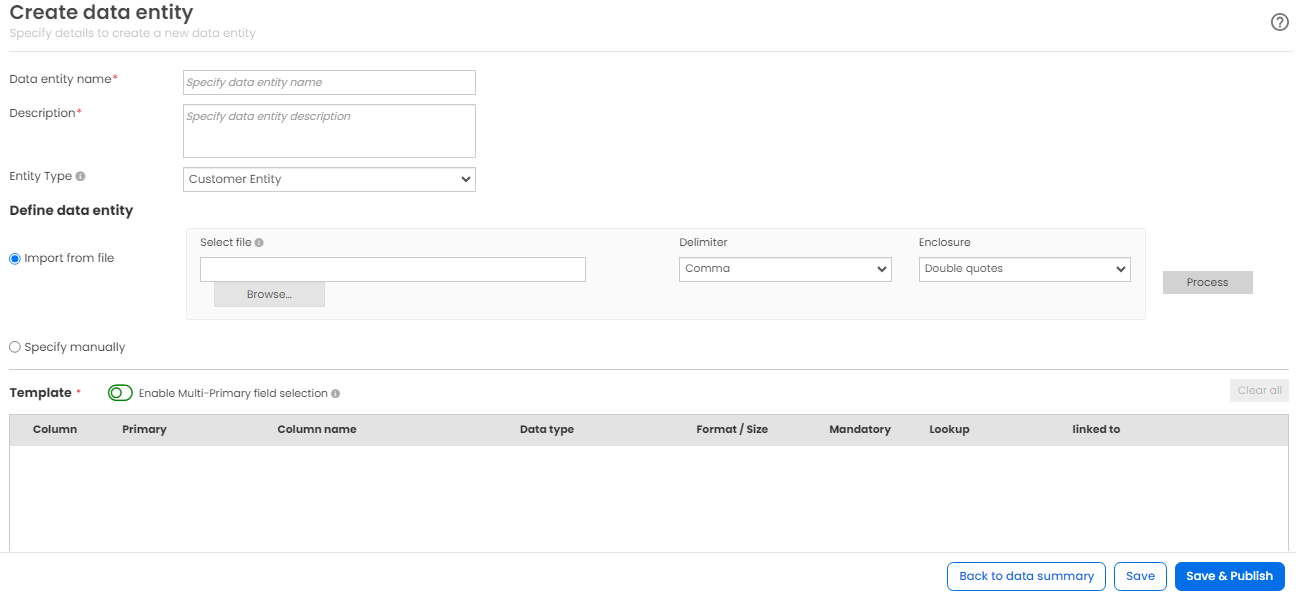
- (Conditional) If you select Import from file, specify the following details:
- In the Select file field, click Browse and select a valid .csv file.
- If the template file that you want to upload contains unicode characters, then the file should be encoded in UTF-8 format.
- The maximum template file size should be 50 KB.
- From the Delimiter dropdown list, select the required delimiter. Available delimiters are Comma, Pipe, and Tilde.
- From the Enclosure dropdown list, select the required enclosure. Available enclosures are Single Quotes and Double Quotes.
- Click Submit. The Template area is updated with the values.
- Notes:
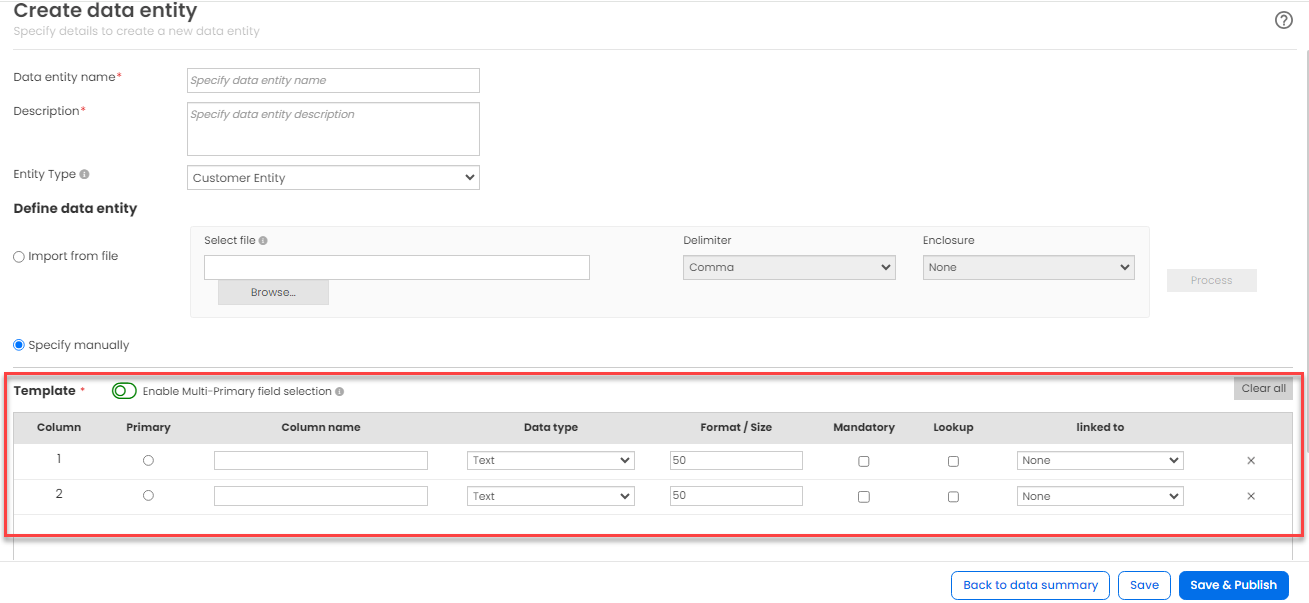
- (Conditional) If you select Specify manually, specify the following details in the Template area:
- Click + Add column. The Template area is displayed with fields.
- Specify the required values in the fields.
- In the Linked to column, select the required attribute. The data entities that are linked to any of these attributes are displayed on the Design page of Journey.
- For Customer entity, the dropdown list displays only External Customer Code, Mobile Number, and Email Address.
- Click Enable multi-primary field selection to enable or disable multiple primary fields.
- If you enable it, the Primary column displays checkboxes to select multiple primary columns.
- If you disable it, the Primary column displays radio button to select a single primary column.
- Click Save to save the data entity.
- Click Back to data summary to go to the Data summary tab.
OR
Click Save & Publish to save the data entity and create the table in data warehouse.